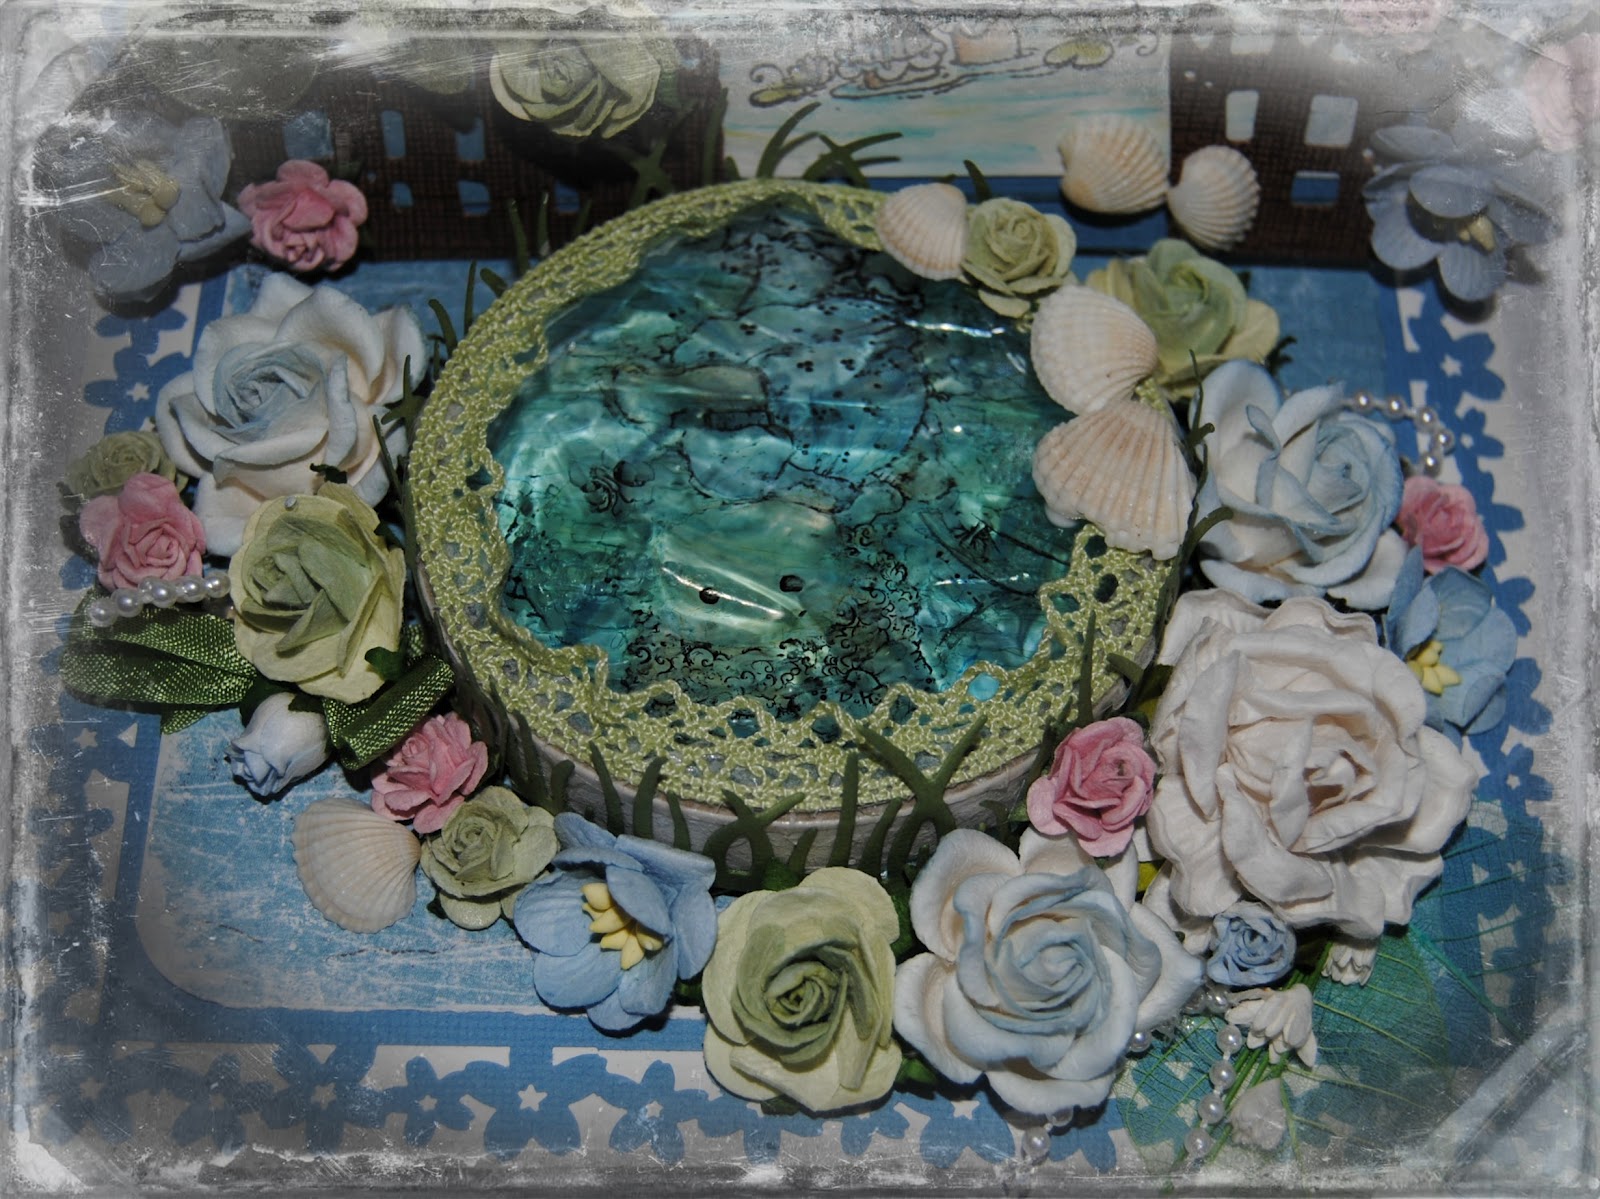
Olen lomalla viimeinkin..ja sainpas viimein tehtyä jotain. Kyselin aikaisemmin toiveita blogini suhteen ja ohjeita toivottiin. Joten tänään luvassa siis lahja laatikko ohjeineen.
Kuvat on osittain vähän huonoja, anteeksi mutta en kerennyt ottaa uusia toivottavasti saatte selvää. Ja vaihteeksi tein taas täysin ruskean kortin..Käytin maskaamis tekniikkaa. Lahjalaatikon sisälle tein nappi korvakorut. Mielellään kuulisin mielipiteitä työstä. Ihanaa päivää muruset.
I am on holiday at last .. Gotcha, and finally do something. I asked in my earlier expectations regarding the instructions and it was hoped. So today, therefore, like a gift box with instructions.
The photos are part of a bit bad, I'm sorry but I do not have time to take new, hopefully you will find out. And I made a change, while completely brown card..I used the masking technique. Inside the gift box I made earrings. Like to hear opinions about the work. Have a wonderful day crumbs.


* OHJE-INSTRUCTIONS*

Tee nuuttaukset kohtiin 1/2",1 1/2" ,6 1/2" ,7 1/2" ja 8"
Käännä paperi ja tee sama toisin päin.
1.Take and cut paper size 8 "x8"
Make lines 1/2 ", 1 1/2", 6 1/2 ", 7 1/2" and 8 "
Turn the paper over and do the same the other way around.


Tee nuuttaukset kohtiin 5" ,6" ja 8 1/2"
2. Cut the card base size of 5 "x11"
Make lines 5 ", 6" and 8 1/2 "

3. Cut out the four point open, the same way as in the picture.

4. Cut a gift to the base 5 "X5"

5. Cut a hole in a gift box, I used the Big Shot mower, but you can make the hole even though the outline of the glass. Fold lines, and at the corners cut off small pieces and add an adhesive tape.


6. Glue the box, before you fold the edges, add a piece of ground in the box. Then fold and glue the outer sides of the pan.

7. Finish the box, I do not adhesive to the inside bottom of the box, but only the bottom of the card.
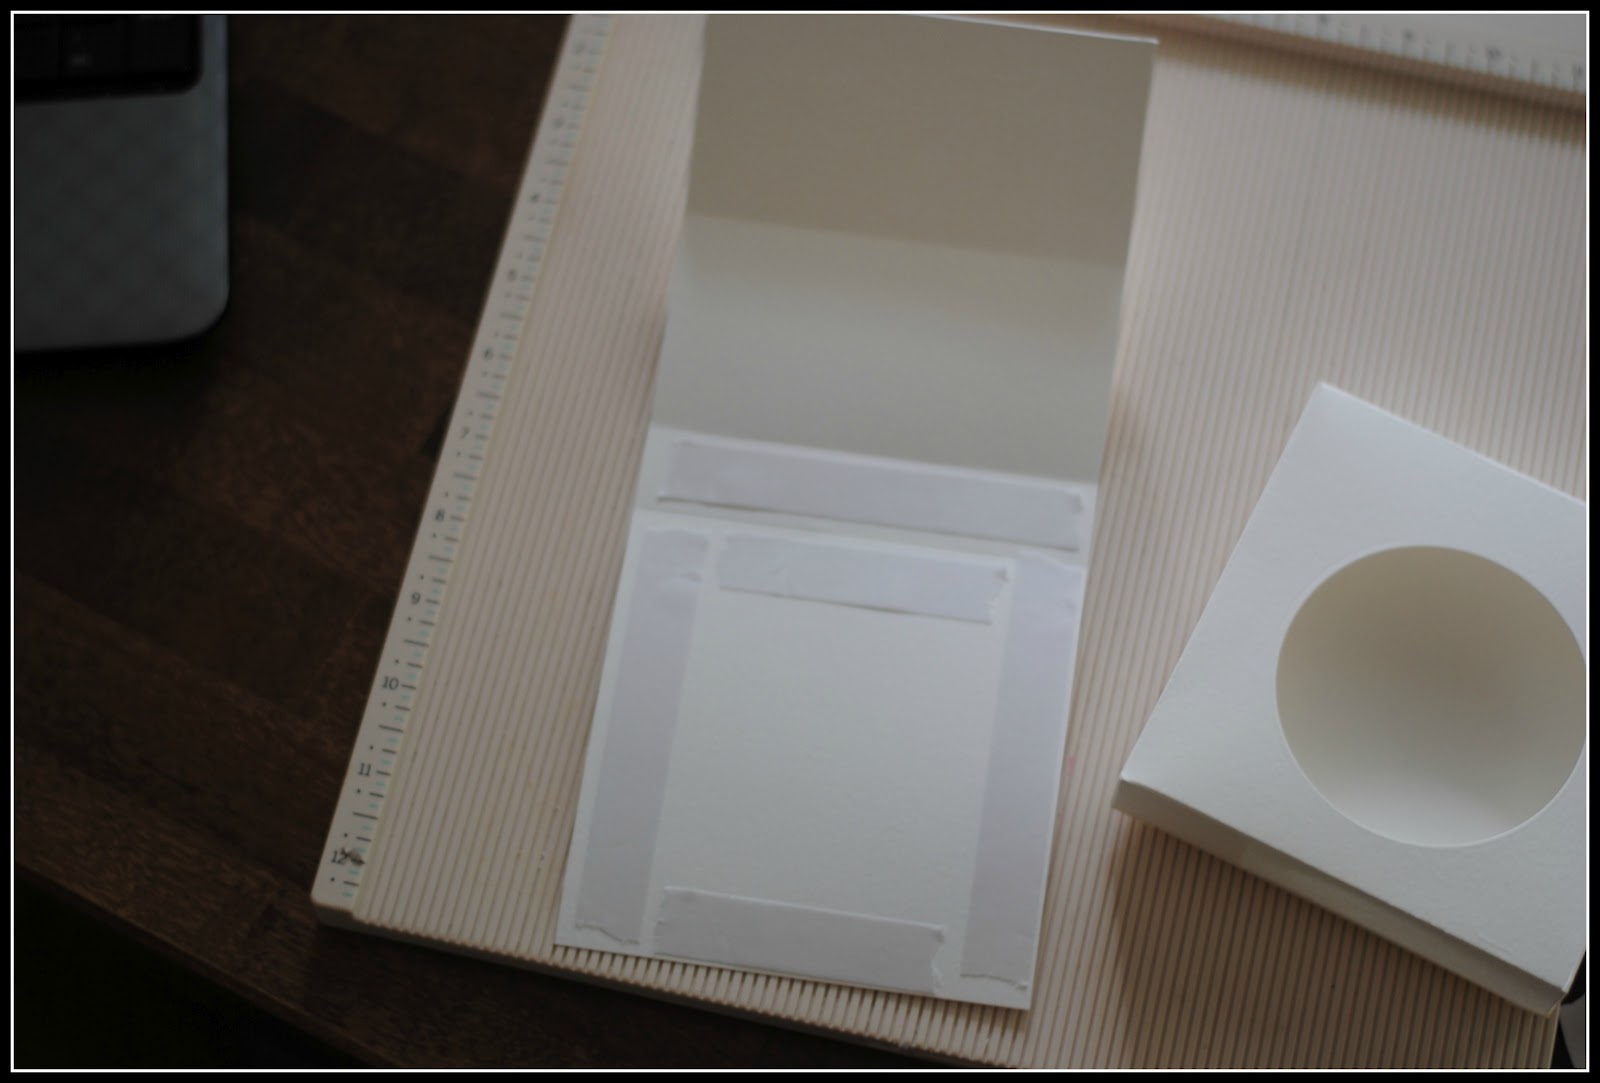
8. Glue the bottom of the card box.

9. Ready to gift box. Now decorate. Decoration subsequent steps. I hope you got clear, and I would be glad if you would leave me feedback.
Challenges:
http://magnoliadownunderchallenges.blogspot.fi/
http://totallytilda.blogspot.fi/
http://tildastown.wordpress.com/
http://toptiptuesday.blogspot.fi/
http://bearlymine-challenges.blogspot.fi/


.jpg)